Your first moderation workflow
In this tutorial you will set up a complete content approval process and take a page all the way from draft to published — passing through review on the way. You will:
create a django CMS project with moderation enabled,
define who reviews content (a Role),
define how content is approved (a Workflow),
group draft content in a Moderation Collection,
submit the collection for review,
approve it as a reviewer, and
publish it.
No prior knowledge of django CMS Moderation is required. You should be comfortable with the Django admin and have Python 3.11+ installed. The tutorial takes about 30 minutes.
Create the project
The quickest way to a project with moderation pre-configured is the
djangocms command that ships with django CMS 5.1 and later. In a fresh
virtual environment, run:
pip install "django-cms>=5.1"
djangocms testproj --moderation
The command creates a testproj directory, installs
djangocms-versioning and djangocms-moderation (moderation builds on
versioning — every moderated object is a draft version), runs the database
migrations and asks you for superuser credentials.
Note
Adding moderation to an existing django CMS project instead? Follow How to install moderation in an existing project first, then rejoin the tutorial at the next section.
Email notifications are part of the moderation process. So that you can see
them during development without a mail server, add a console email backend at
the end of testproj/settings.py:
EMAIL_BACKEND = "django.core.mail.backends.console.EmailBackend"
Then start the development server:
cd testproj
python -m manage runserver
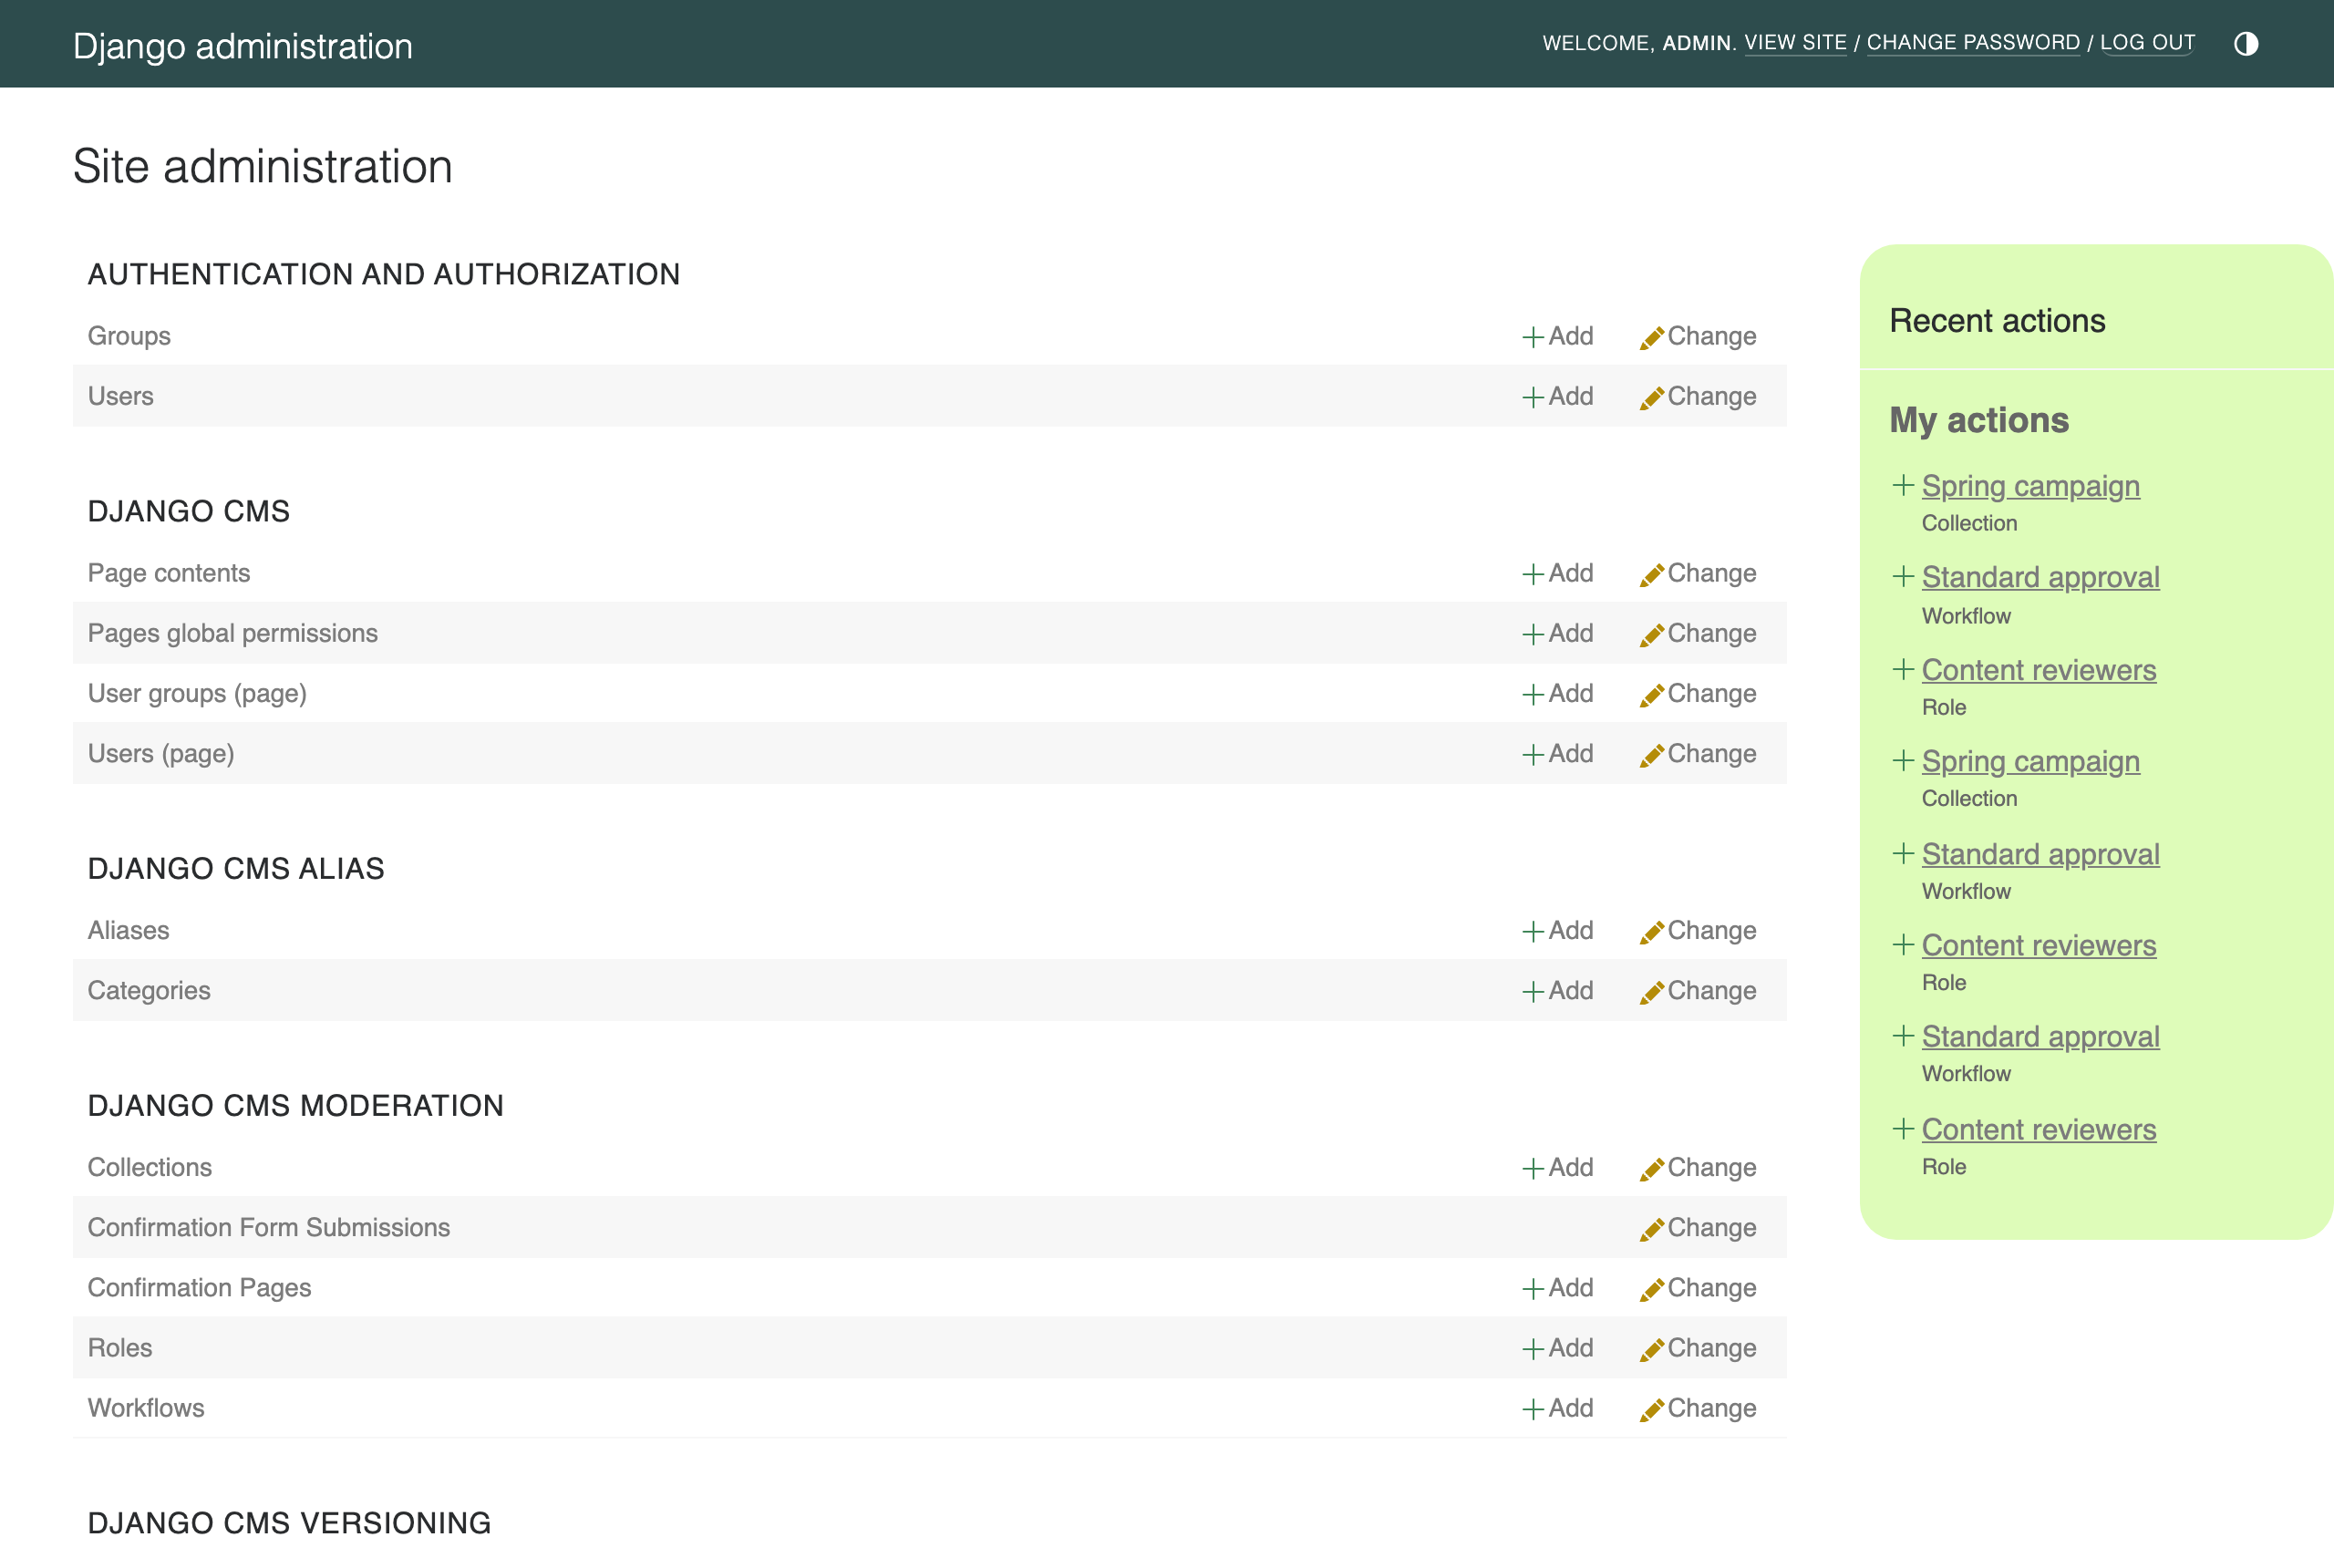
Open http://localhost:8000/admin/ and log in with your superuser. The admin index now contains a django CMS Moderation section — this is where collections, roles and workflows are managed:
Create a reviewer
Moderation is about separating the people who write content from the people who approve it, so we need a second user.
In the admin, go to Authentication and Authorization → Groups and add a group called
Reviewers. It needs no special permissions for this tutorial beyond access to the moderation admin: assign it all permissions of thedjangocms_moderationapp (search for “moderation” in the permission filter).Go to Users and add a user called
reviewer. Tick Staff status so they can access the admin, and add them to theReviewersgroup.
Define who reviews: the Role
A Role tells moderation who is allowed to act at a given step of a workflow. A role points at either a single user or — as here — a group.
Go to django CMS Moderation → Roles → Add Role, name it
Content reviewers, select the Reviewers group and save.
Define the approval process: the Workflow
A Workflow is the sequence of approval steps content has to pass before it can be published. Ours will have a single step: approval by the content reviewers.
Go to django CMS Moderation → Workflows → Add Workflow:
Name it
Standard approval.Tick Is default — new collections will use this workflow unless another is chosen.
In the Steps section, select the
Content reviewersrole for the first step.
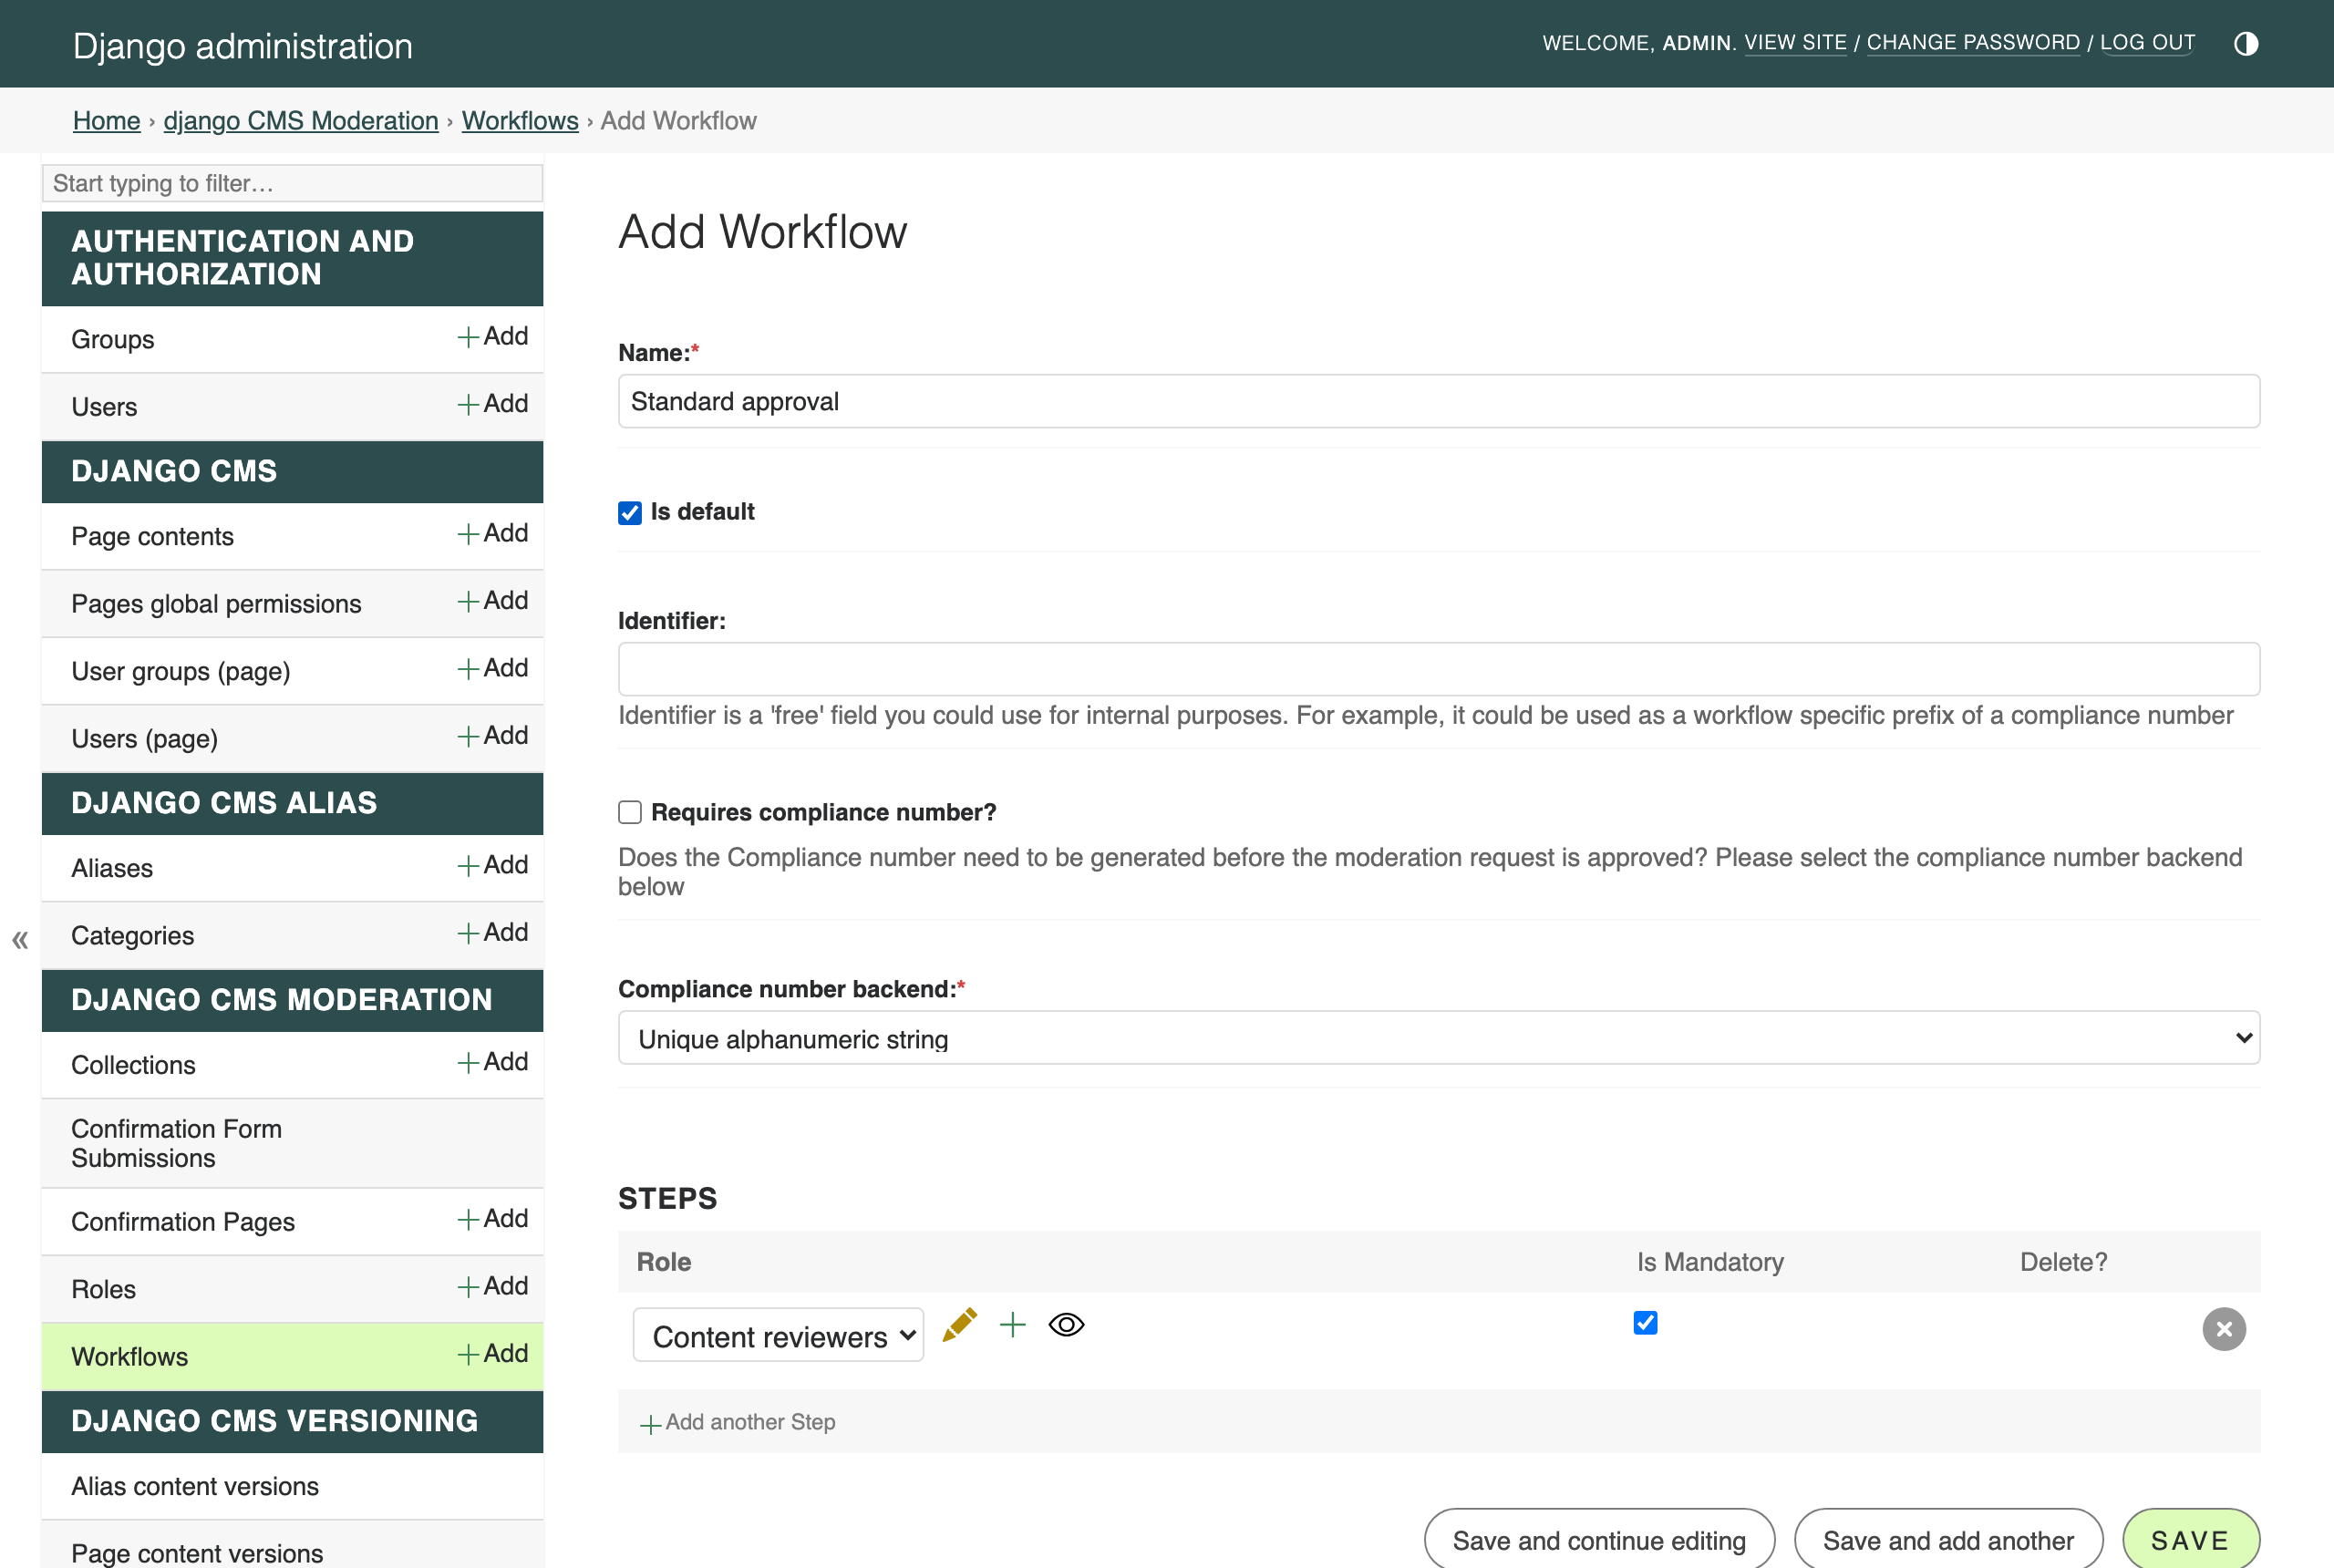
Save the workflow. Organisations with more elaborate sign-off processes (legal, compliance, marketing …) add one step per approving party — see Workflows and Steps.
Create a collection
Content is never moderated one piece at a time; drafts are grouped into a Moderation Collection — think of it as a batch, chapter or release that should be reviewed and published together.
Go to django CMS Moderation → Collections → Add collection, name it
Spring campaign and pick the Standard approval workflow:
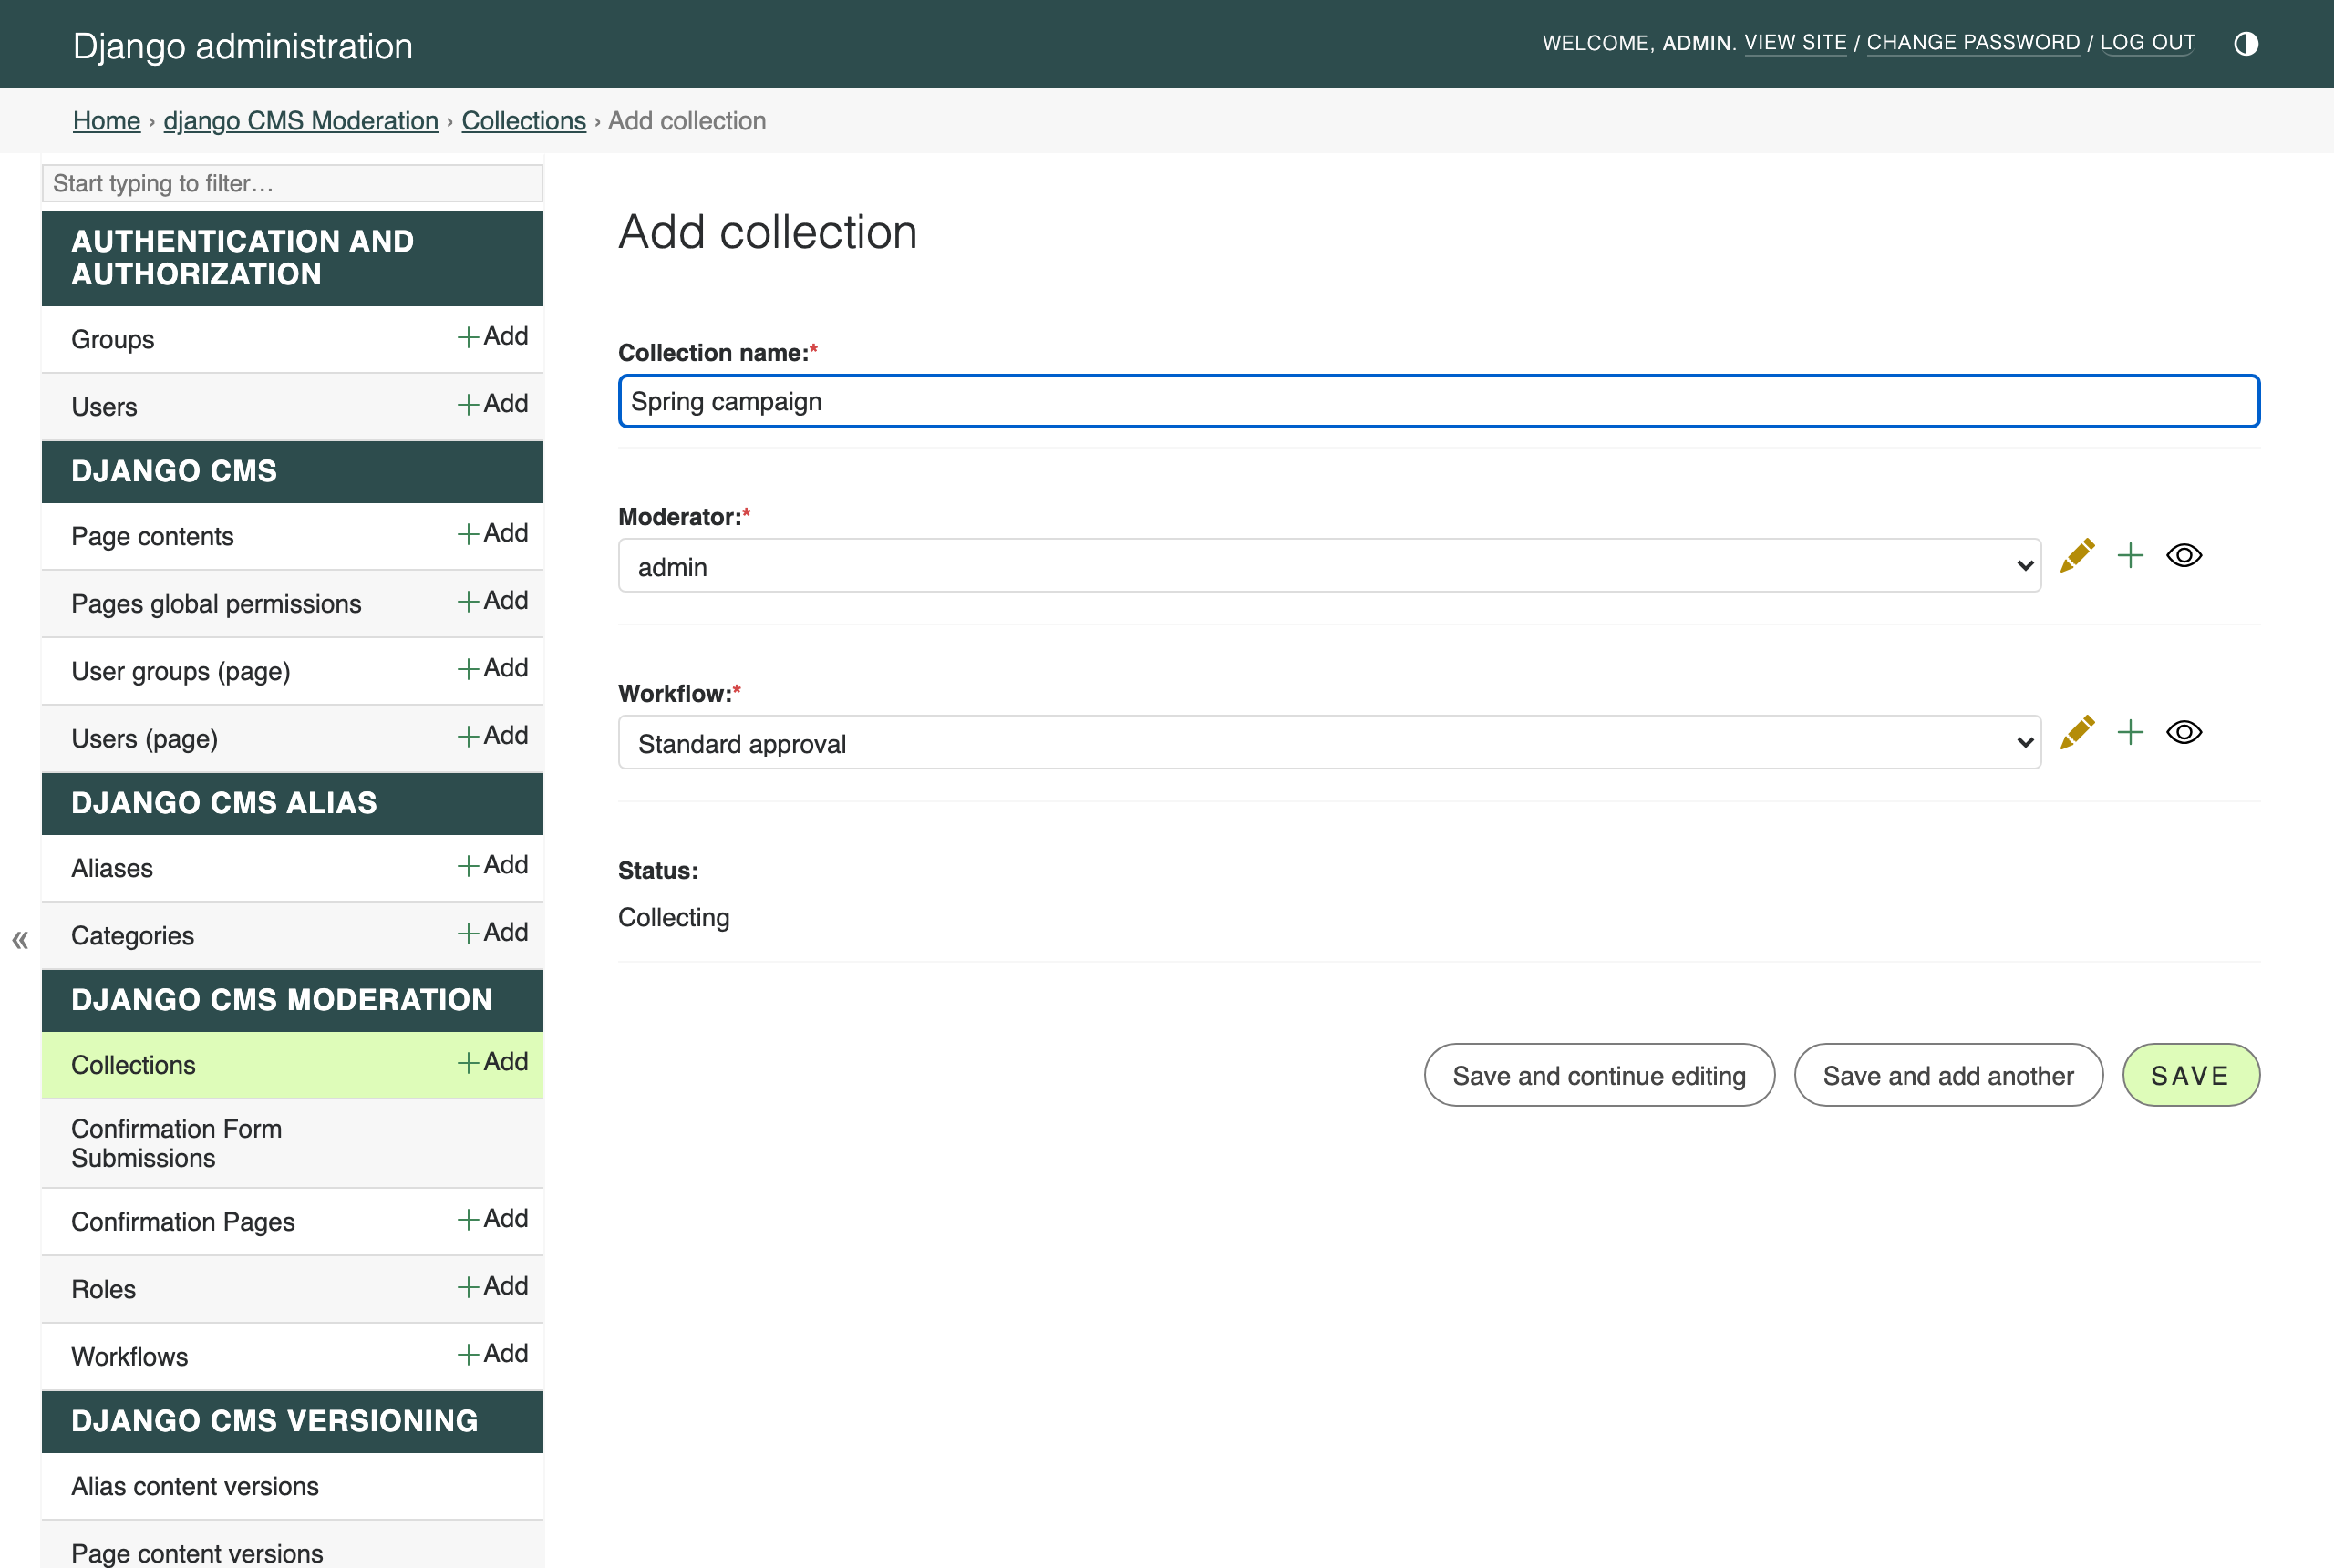
Save it. You are automatically recorded as the collection’s author (its moderator) — only you can add content to it or submit it for review.
Add content to the collection
Now create something to moderate. From the CMS toolbar (the Create
button) or django CMS → Page contents in the admin, create a page called
Spring campaign with some content.
Because the page is a draft version and pages are registered for moderation, the toolbar of the draft shows a Submit for moderation button:

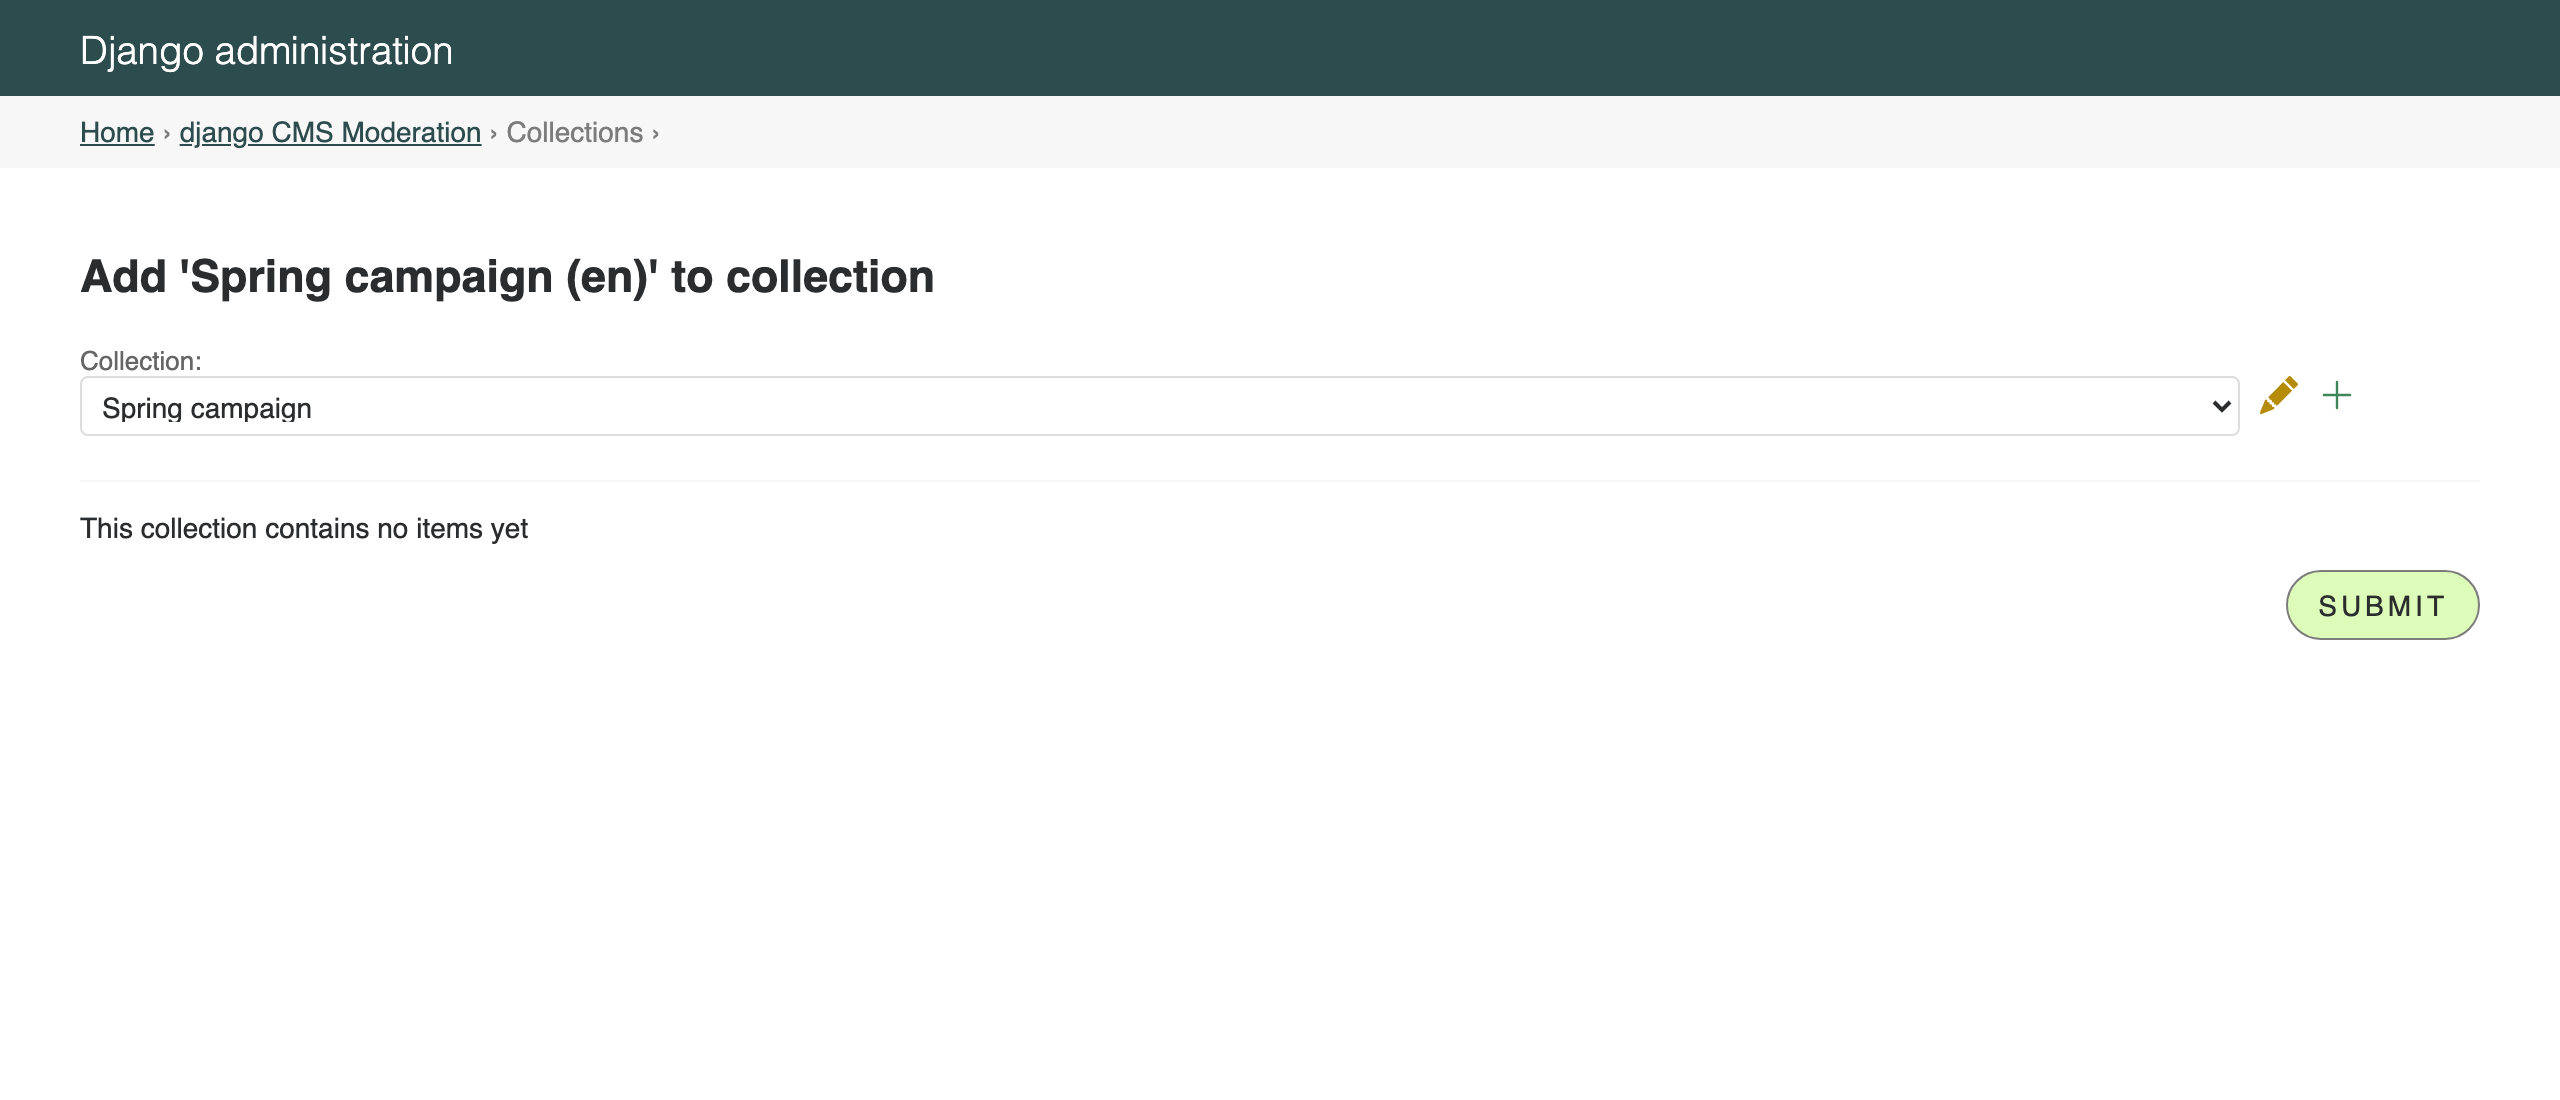
Click it. A dialog asks which collection the draft should be added to —
choose Spring campaign and submit:
Note
When you add a page, any moderated draft content used by plugins on that page (for example aliased content) is added to the collection along with it, so reviewers always see the complete picture.
The toolbar button now reads In collection “Spring campaign”. While the draft is in a collection it is associated with that collection’s workflow.
Submit the collection for review
Go to django CMS Moderation → Collections and click the requests icon of your collection (in the actions column) to see its content. The page is listed as a Moderation Request — a “request to publish” carrying all the review metadata:
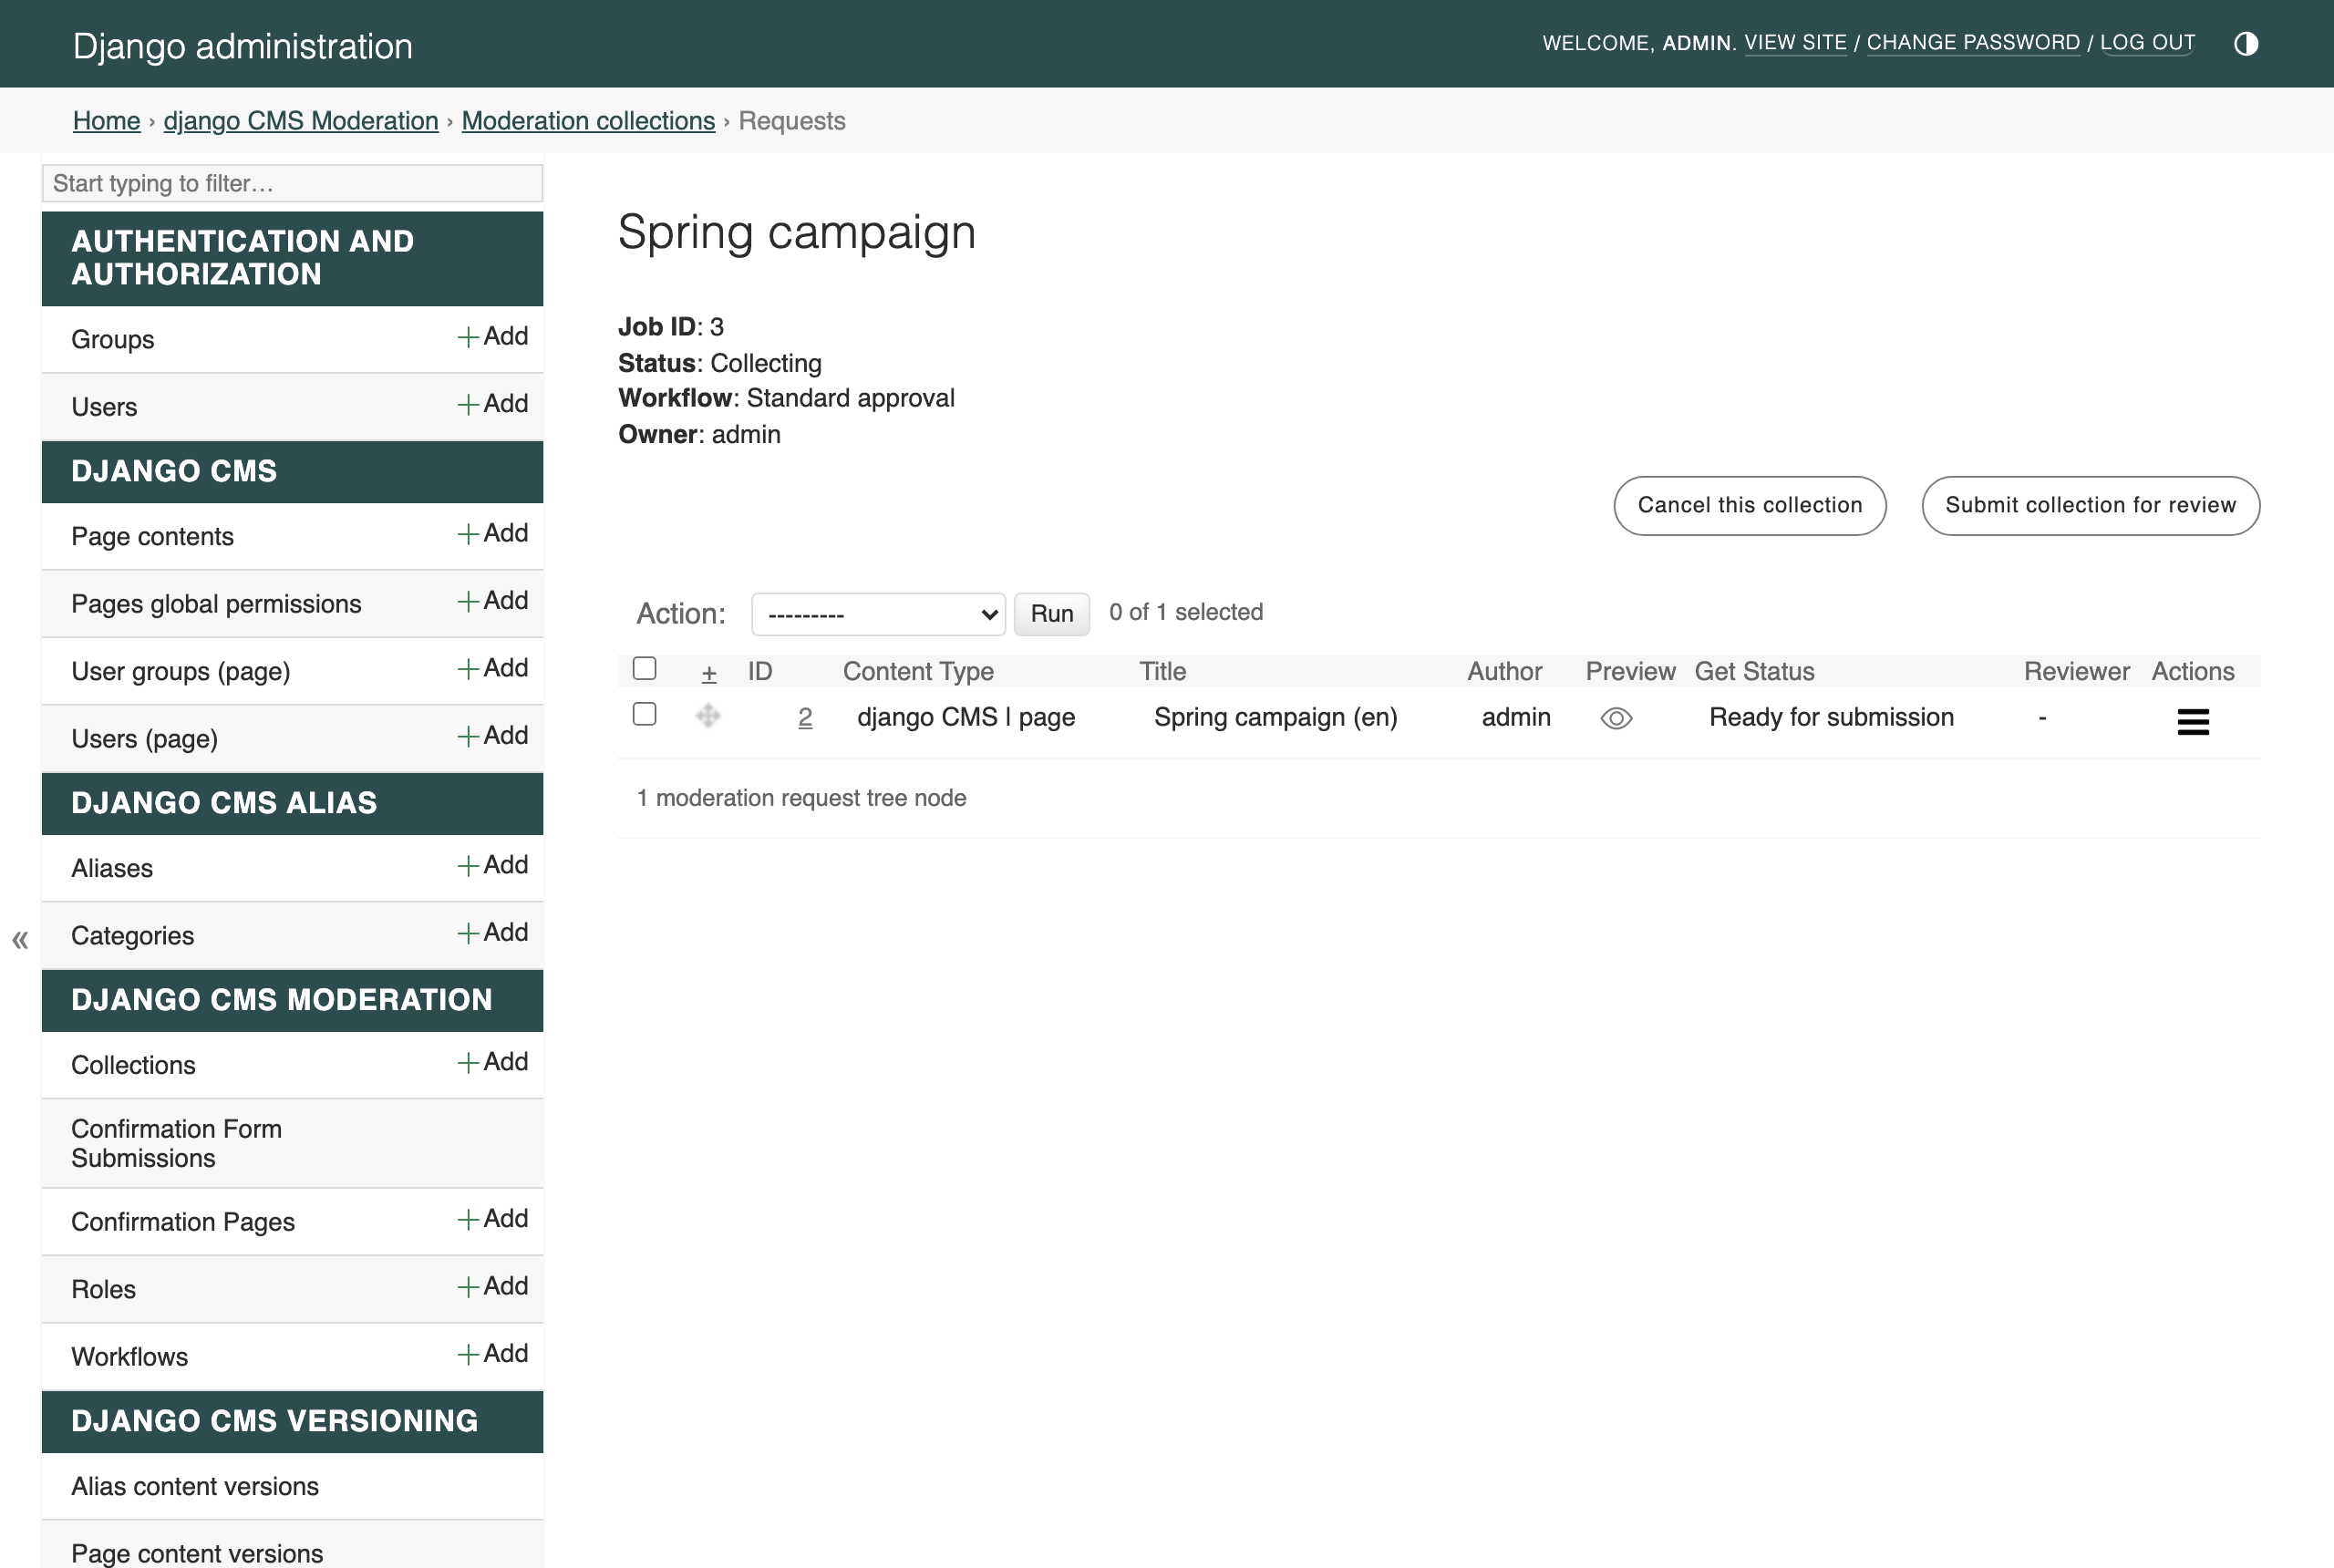
Click Submit collection for review. You are asked which review group the first workflow step should notify:
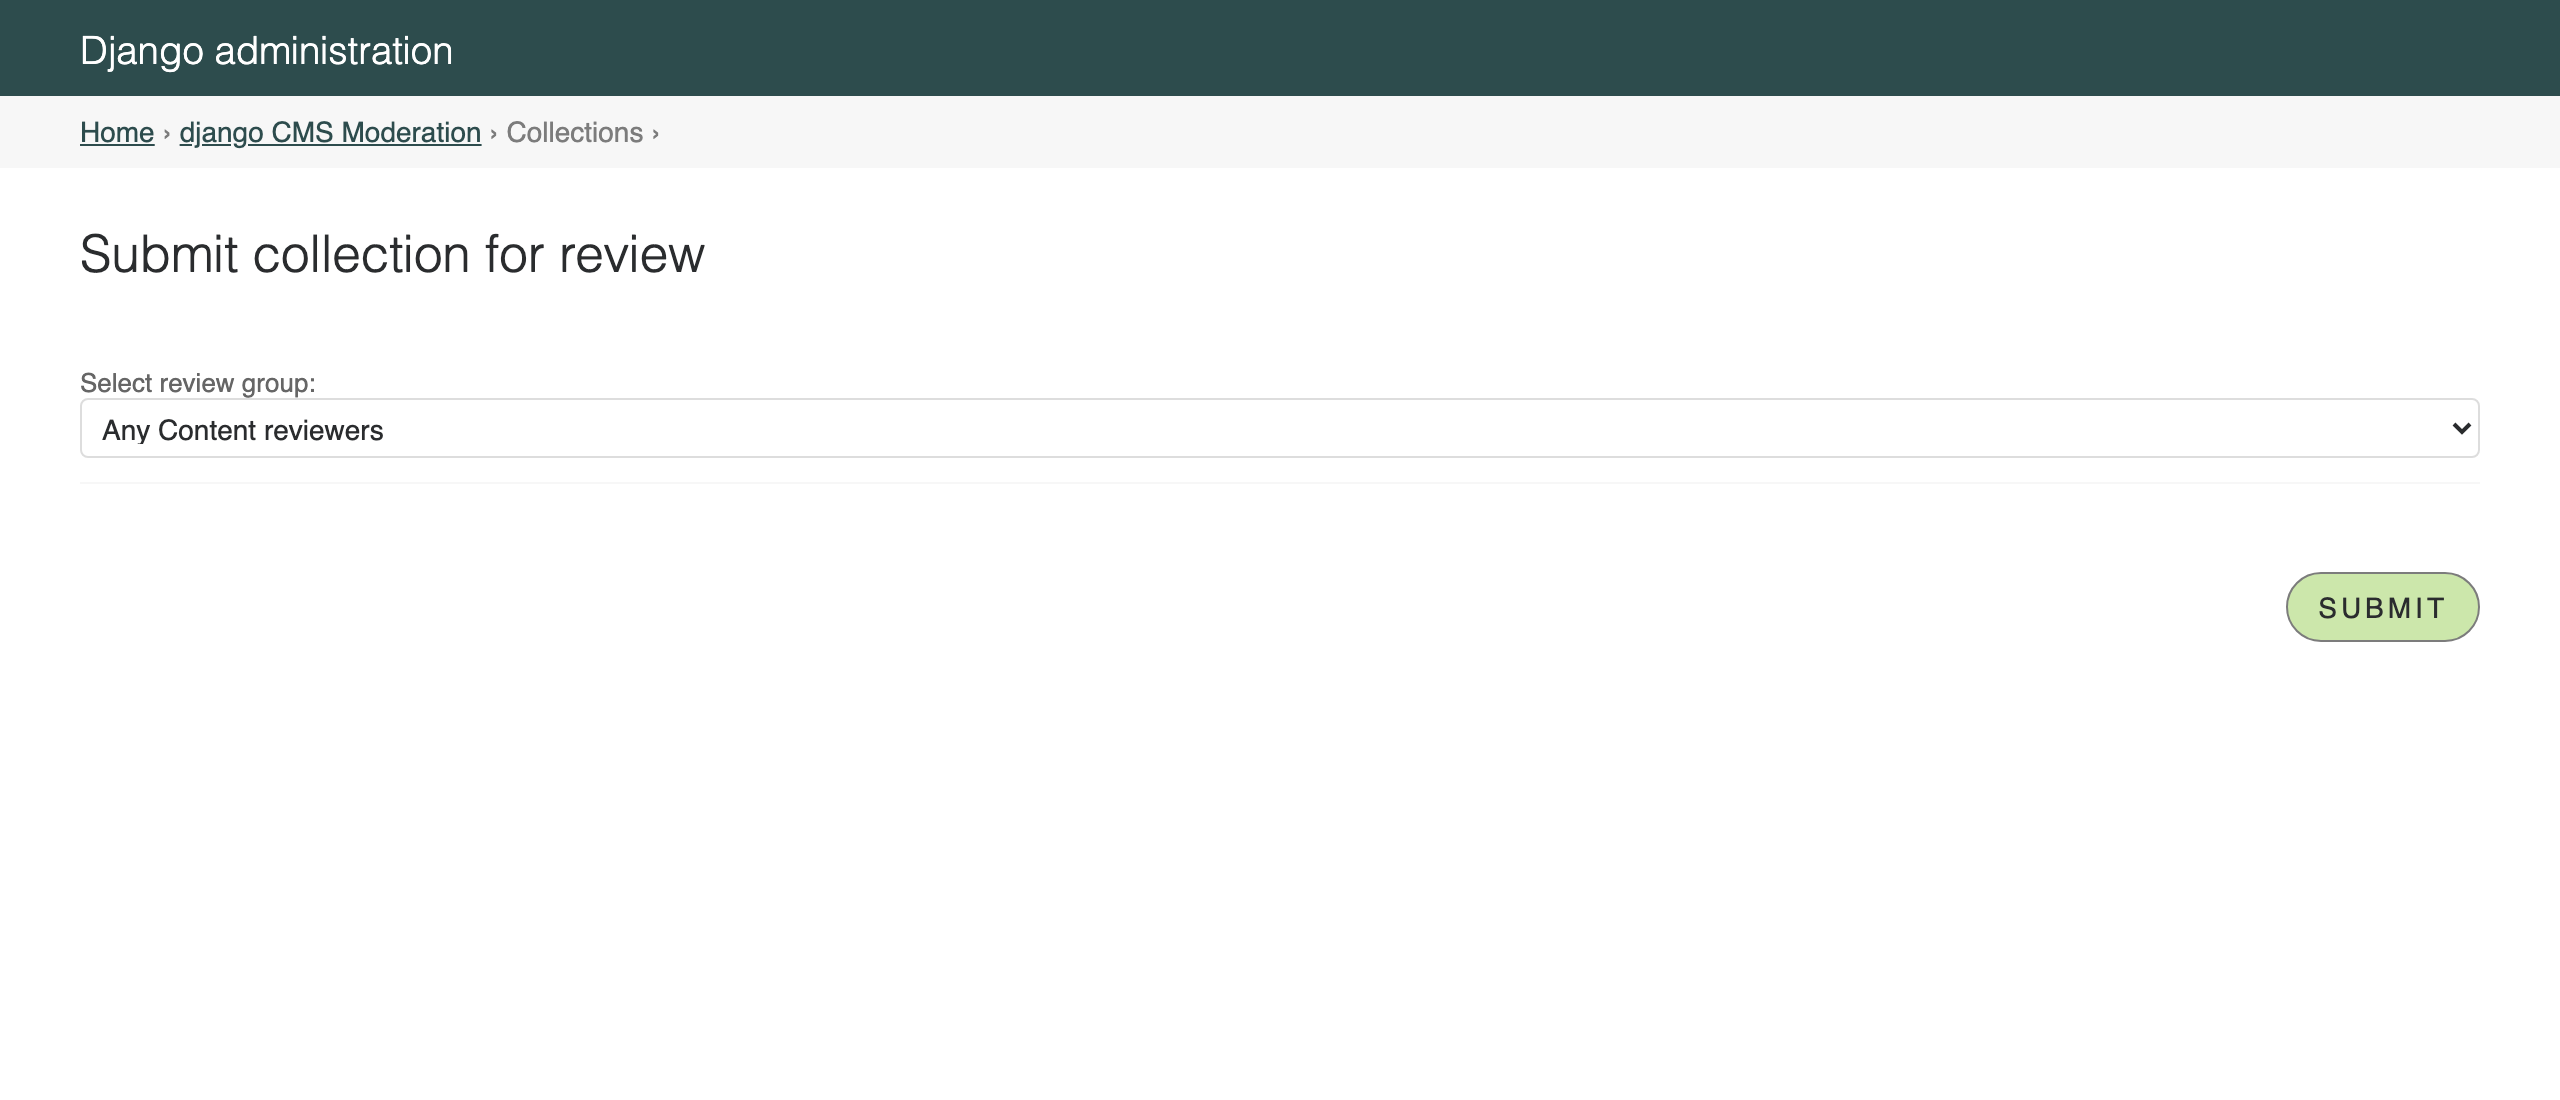
Submit. Two things happen:
The collection’s status changes from Collecting to In review. From now on no new drafts can be added and the drafts in it can no longer be edited — they are review-locked.
The reviewers are notified by email (check the runserver console — you will see the notification addressed to your reviewer).
Review and approve
Time to switch hats. Log out (or use a private browser window) and log in as
reviewer.
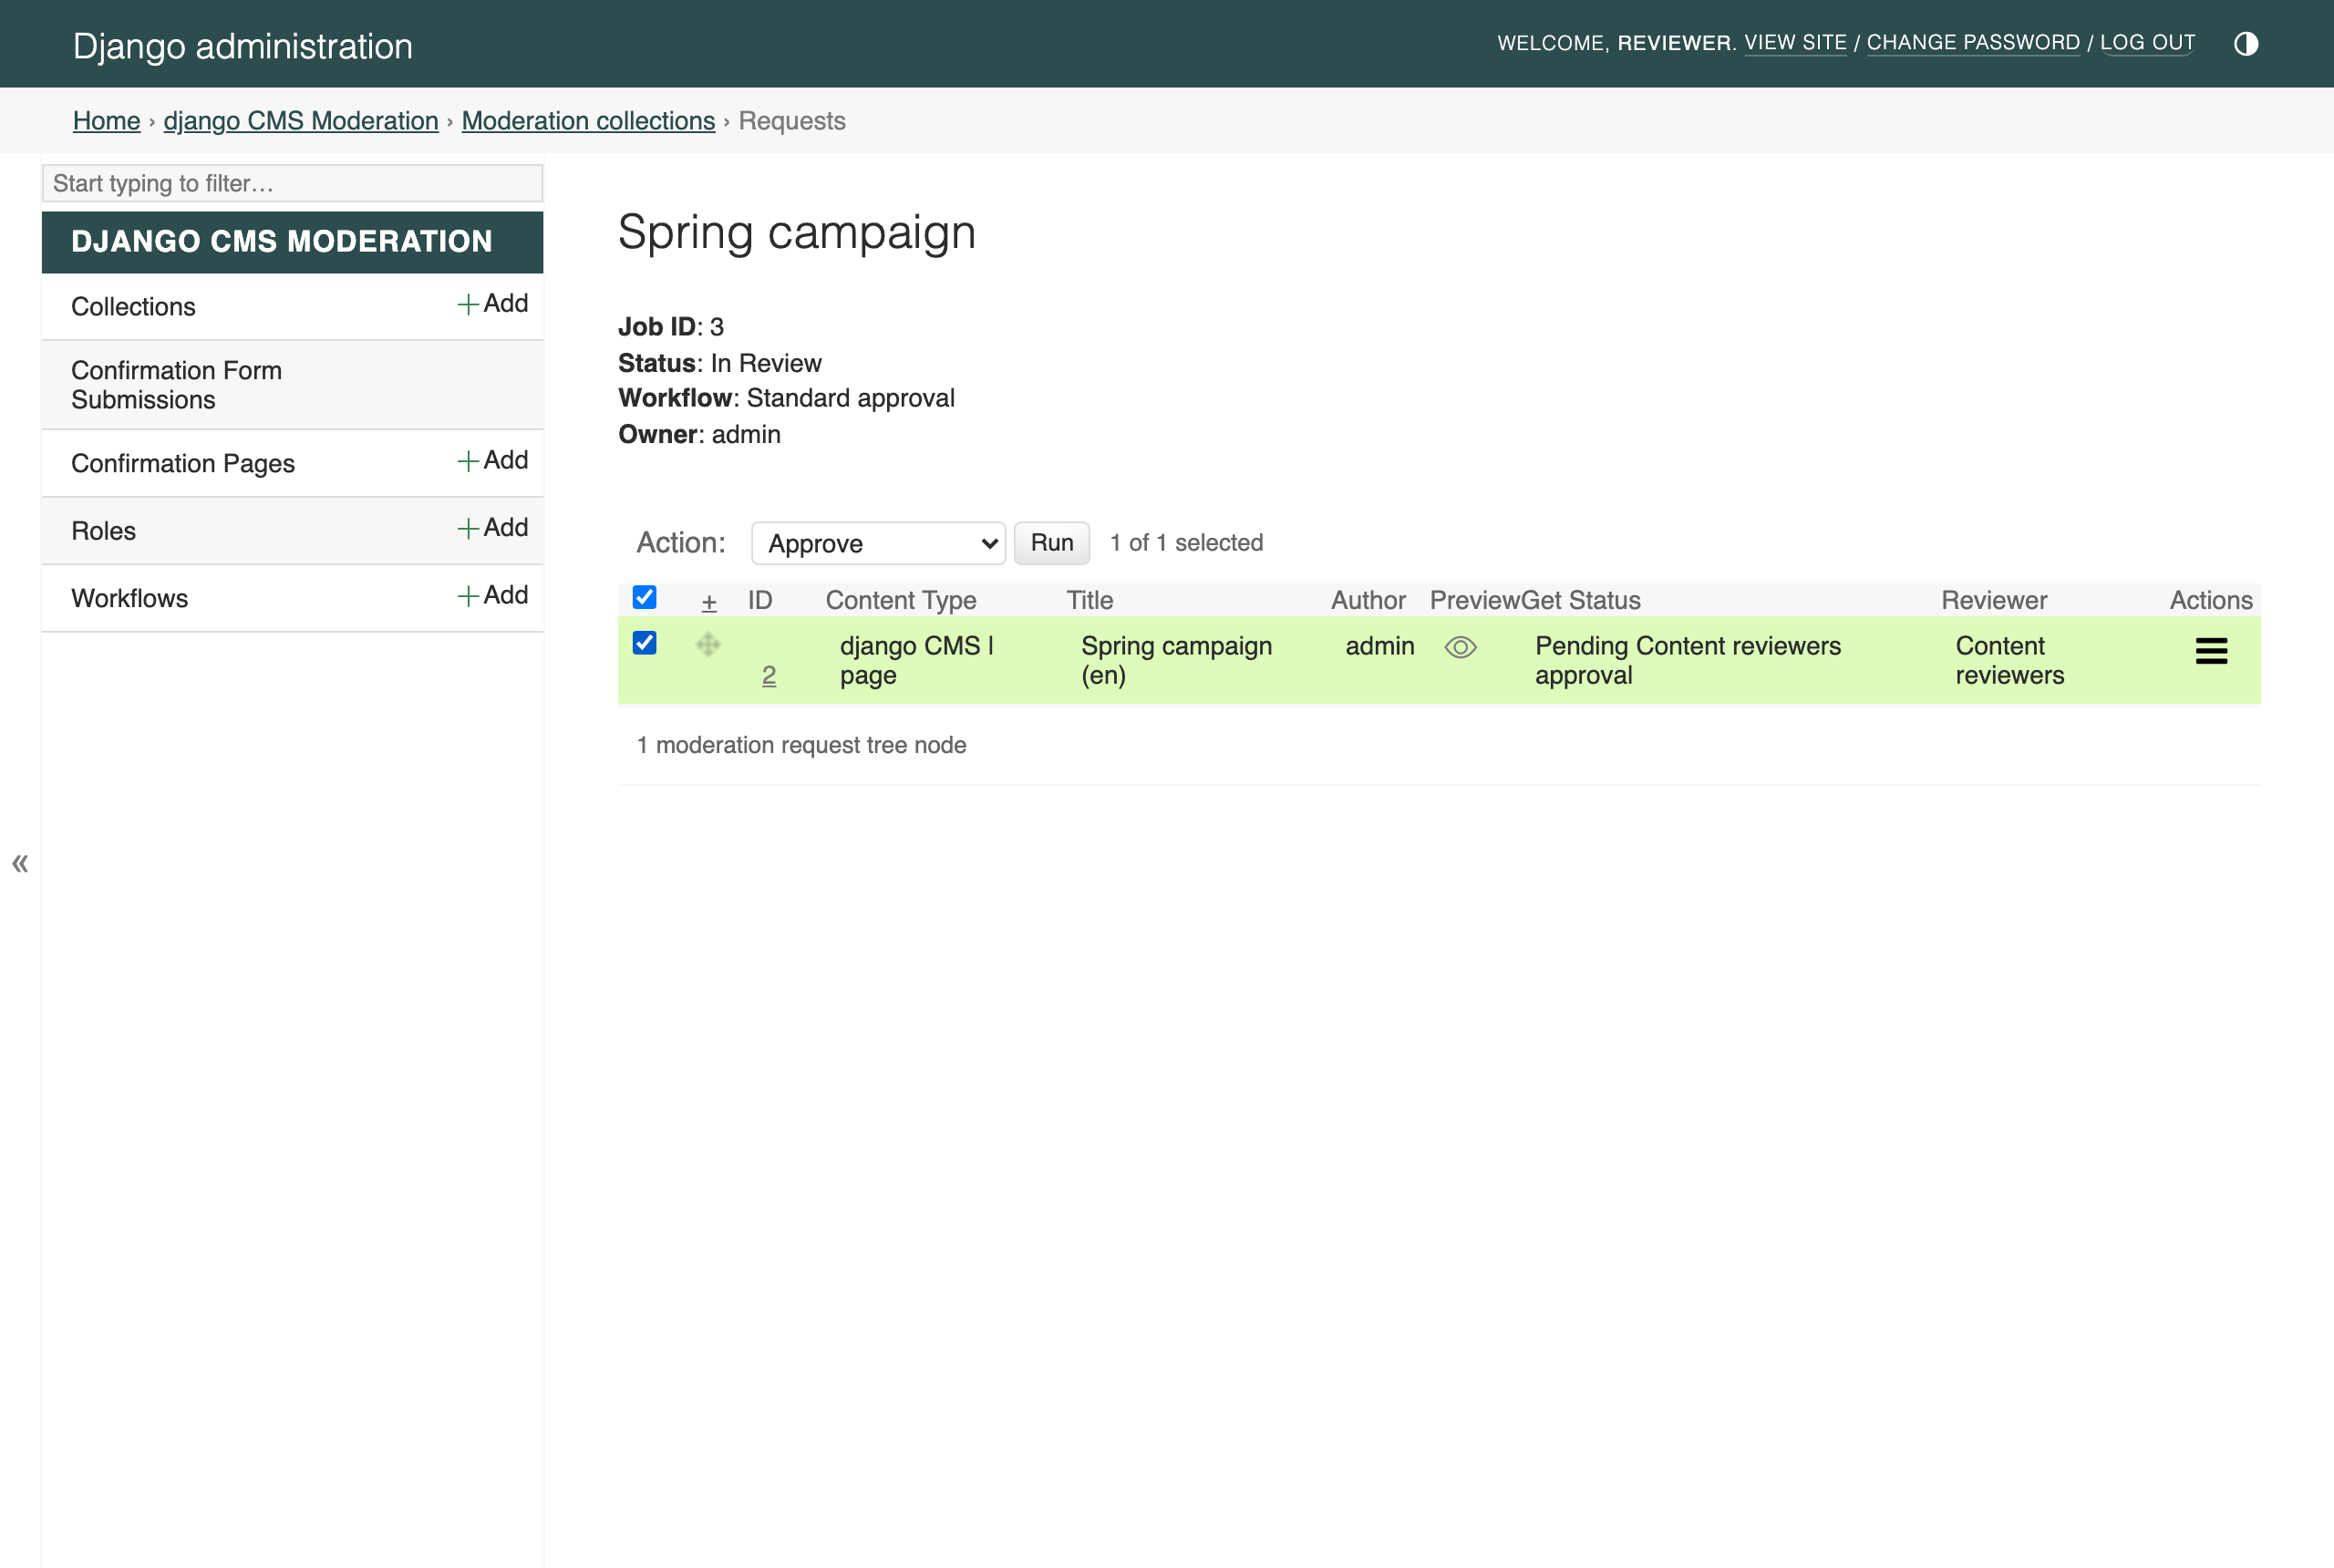
Go to django CMS Moderation → Collections and open the Spring
campaign requests view. As a reviewer you see the pending request with its
status Pending Content reviewers approval. Use the eye icon in the
Preview column to inspect the content, then tick the request, choose
Approve in the action dropdown and click Run:
A confirmation screen summarises what you are approving:
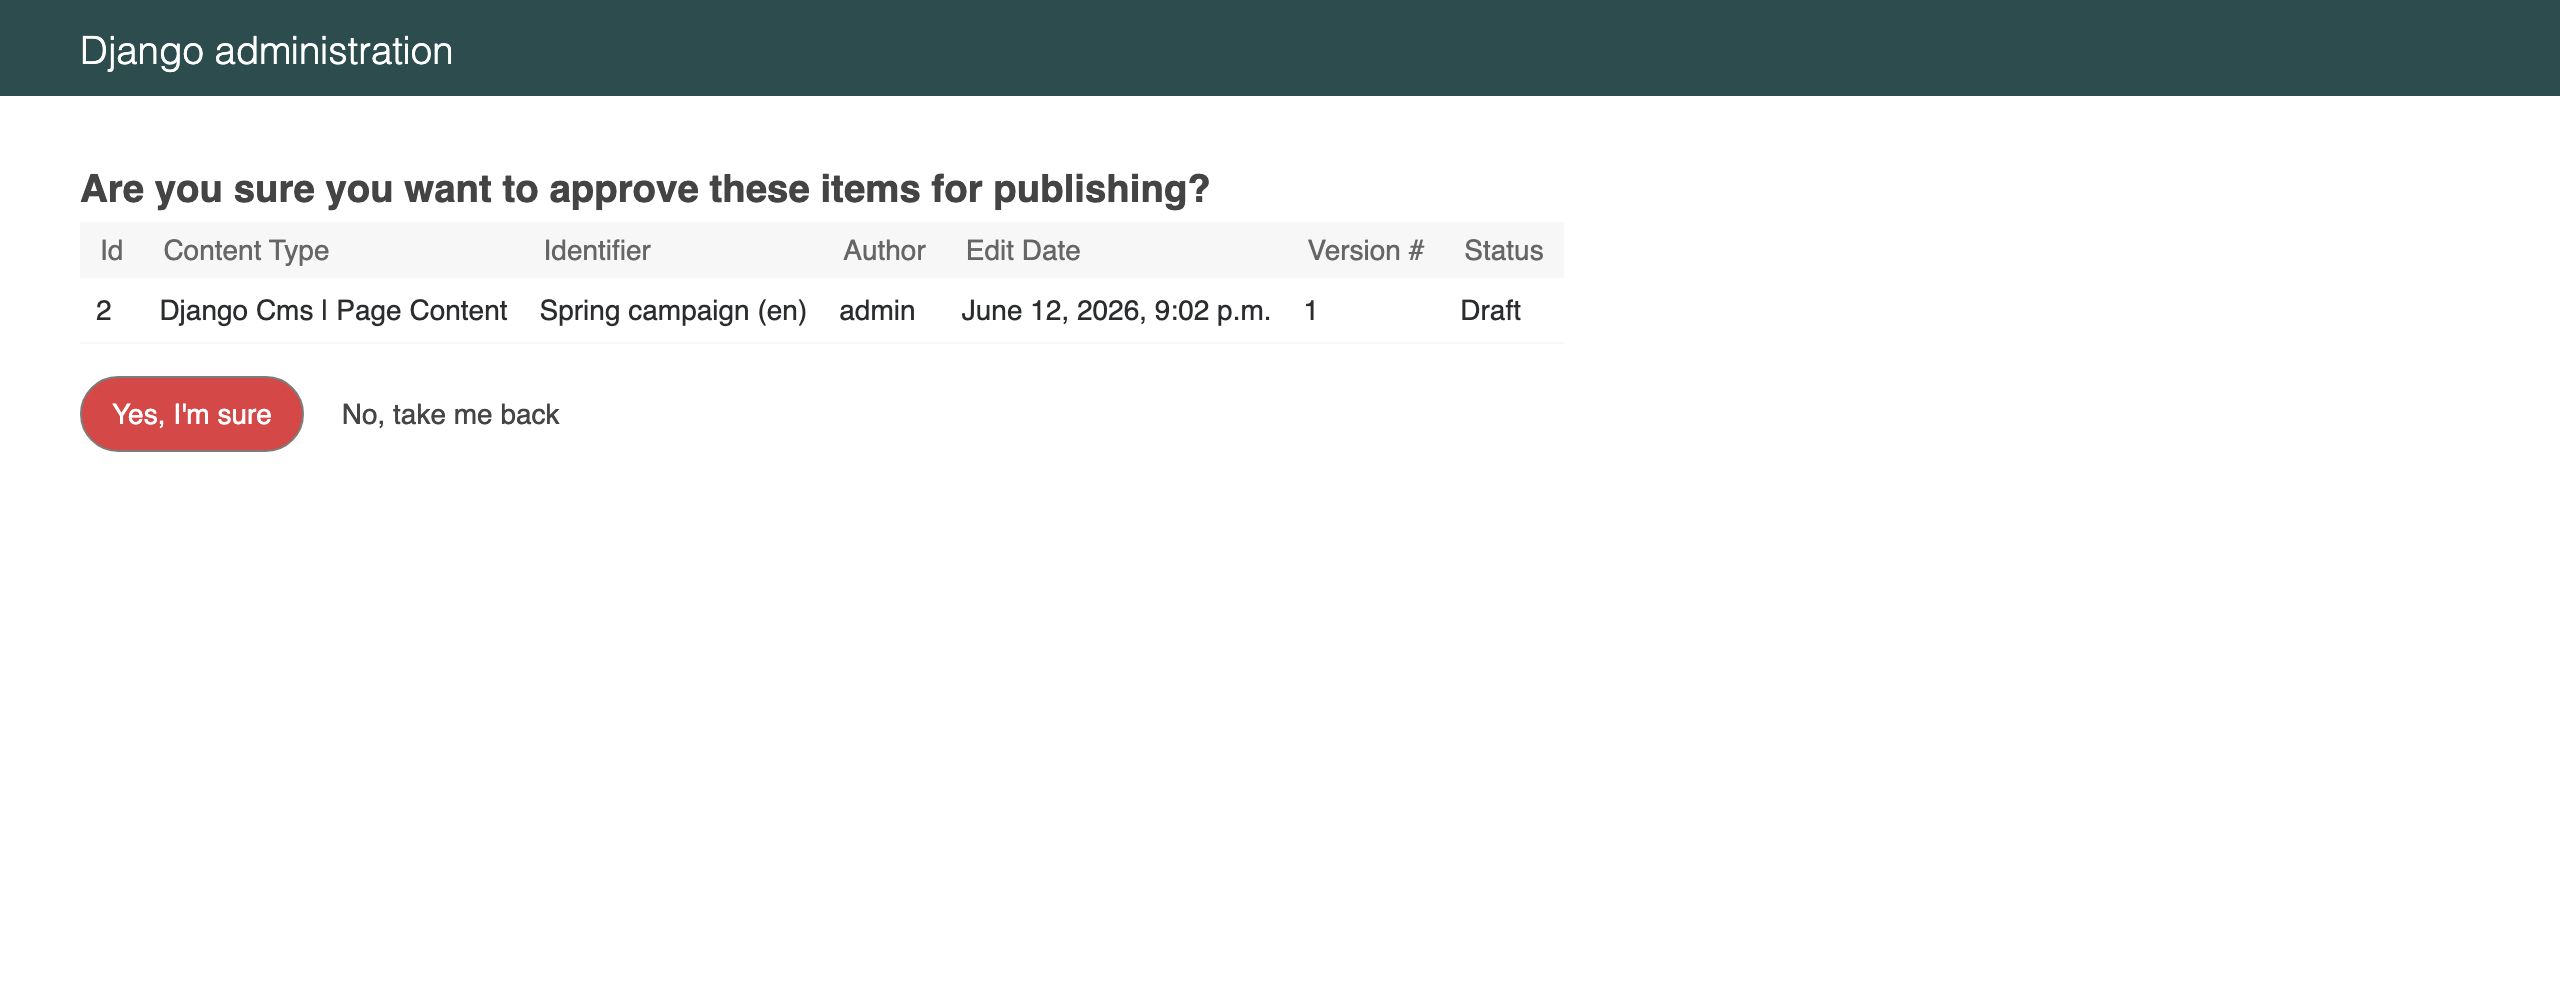
Confirm. The request status changes to Ready for publishing and the collection author is notified by email. Had the content needed more work, you would have chosen Submit for rework instead, sending it back to the author with your comments.
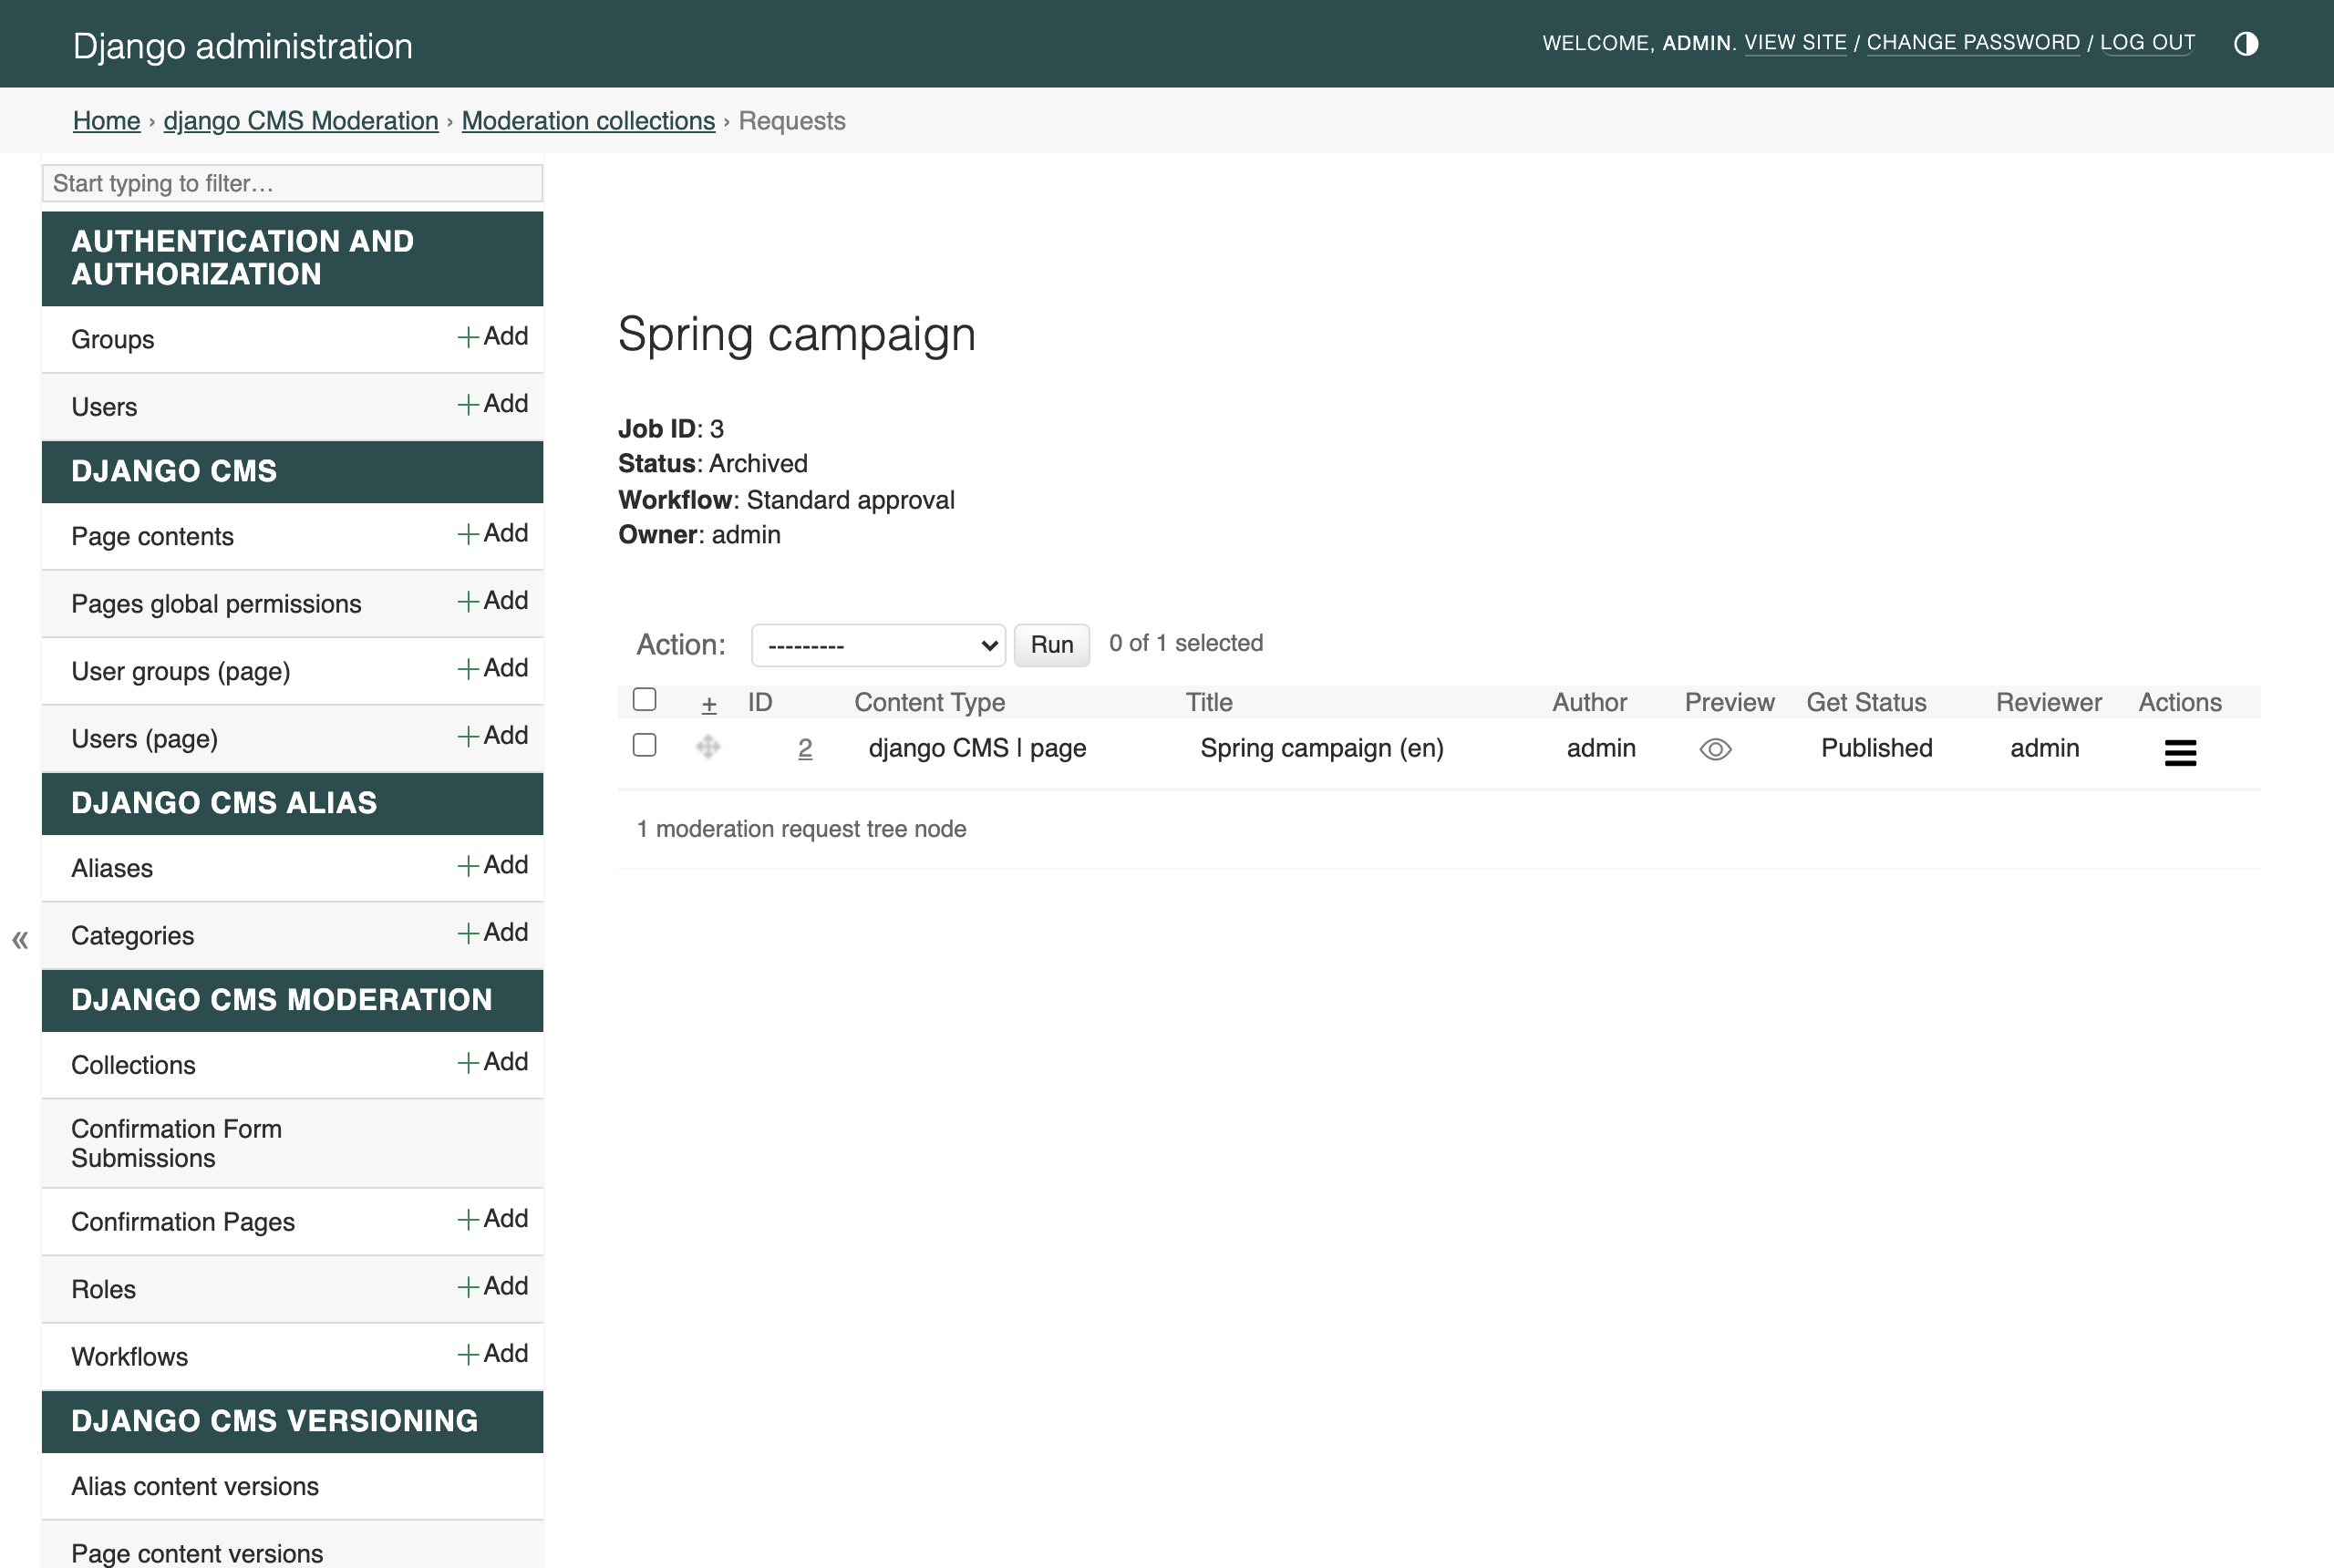
Publish
Switch back to your superuser account and open the collection’s requests view again. Approved content is published by the collection author: just as when approving, select the request, choose Publish in the action dropdown, click Run and confirm. The draft version is published and is now live on the site. Because every request in the collection has been moderated, the collection is automatically archived:
Visit http://localhost:8000/ — your page is live, and it got there through a full editorial approval process.
What you have learned
Roles define who may review (a user or a group).
Workflows chain one or more review steps, each assigned to a role; the default workflow is used for new collections.
Drafts are grouped into collections; submitting a collection for review locks its content and notifies the reviewers of the first step.
Reviewers approve or send back for rework; the author publishes approved content; fully moderated collections archive themselves.